
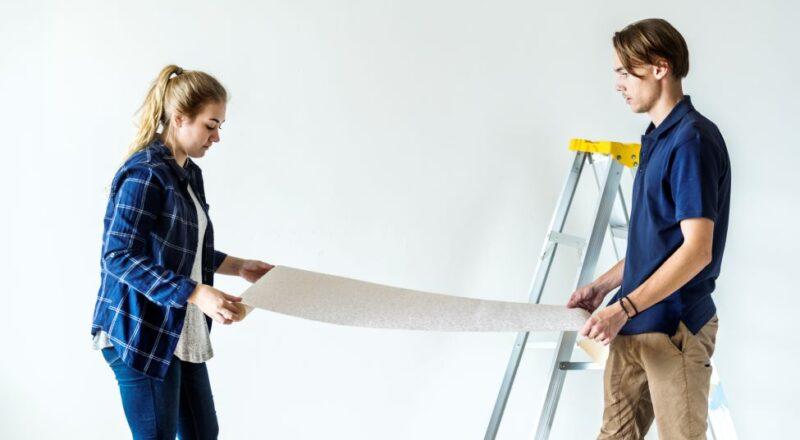

Adding wallpaper to a room is a great way to add colour, texture or pattern to your home. You may be wallpapering all four walls of a room or adding a featured wallpapered wall; either way with the right tools and right guide it is actually a very simple DIY job. This guide is perfect for a DIY beginner who doesn’t know where to start with wallpapering. We will walk you through the full process from calculating how many rolls you need to the final finishing touches.
Wallpapering a room doesn’t have to cost an arm and a leg, obviously the bigger the room the more wallpaper you will need to buy but with this guide you can achieve a professional look without having to splash out on the most expensive wallpaper. It is more important to do the job right than to spend a load of money on it.
It is likely that a wallpapering job will take approximately 1-3 days to complete, of course this depends on how big your surface area is. Follow the guide step-by-step and try not to rush the process in order to achieve the best possible results
If you are a complete beginner to DIYing it may be useful for you to give our blog on the 10 Essential Tools for DIYers a read: click here
Materials Needed:
The materials you need will vary depending on the surface of your wall but there are a few must-haves:
- Wallpaper (either “paste-the-wall” wallpaper or “paste-the-paper” wallpaper”) – Buy Here
- Paste-the-Wall or Paste-the-Paper Adhesive – Buy Here
- Sugar Soap – Buy Here
- Filler – Buy Here
- Universal Primer (for plastered walls) – Buy Here
- Acrylic Primer (for painted walls) – Buy Here
Tools Needed:
Don’t be overwhelmed by this long list of tools, it is likely that you already own some of them. The more specific tools are very simple to use and even master.
- Dust Sheet – Buy Here
- Sponge/Damp Cloth – Buy Here
- Filing knife (if needed) – Buy Here
- Sandpaper (if needed to smooth down your wall) – Buy Here
- Spirit Level – Buy Here
- Tape Measure – Buy Here
- Pencil – Buy Here
- Scissors – Buy Here
- Retractable Knife/Trimming Wheel – Buy Here
- Bucket – Buy Here
- Pasting Brush – Buy Here
- Pasting Table – Buy Here
- Wallpaper Smoother/Soft Steam Roller – Buy Here
- Seam Roller – Buy Here
- Radiator Roller – Buy Here
- Stepladder – Buy Here
- Screwdriver (if wallpapering around a light switch) – Buy Here
- Ruler – Buy Here
Safety Kit Needed:
We always preach the importance of safety and this job is no different.
Planning and Preparation:

There are two main types of the wallpaper: “paste-the-wall” wallpaper and “paste-the-paper” wallpaper.
TIP: For a wallpapering/DIY newbie then we suggest using a “paste-the-wall” wallpaper as it is the easier option and is certainly less fiddly.
Measuring and Cutting Wallpaper:
You first must work out how much wallpaper you need for your job, to do this you need to measure your room. To calculate your number of drops, you’ll need to measure the width of each wall (or just the one if you are doing a feature wall) and divide this total by the width of your wallpaper. Next measure the height of the room and multiply this by the number of drops you need; divide this total by the length of a roll, minus the pattern repeat (this is often specified by the manufacturer on the product), this will give you the number of rolls needed.
Before hanging your wallpaper, we recommend that you cut your wallpaper into manageable sections. Using a pencil and ruler/spirit level mark on the back of wallpaper a line across the width of the paper at the height of your wall, plus 10cm extra to allow for trimming. Then cut along this line using scissors and use this first cut strip as a guide to cut the rest of your strips.
TIP: Place your strips edge to edge so that the patterns line up.
TIP: Number the strips so that you know which order to hang them up in.
Preparing your Walls/Room:
Begin by removing any old paper using a sponge/damp cloth or wallpaper remover, be sure to allow the surface to thoroughly dry before you start hanging.
If you are wallpapering onto plaster then sand down the walls and apply a universal primer. The universal primer helps the wallpaper grip to the wall.
If you are wallpapering over paint, wash the wall with sugar soap, let it dry and apply acrylic primer prior to hanging.
If your wall has any stains or small imperfections then you may want to use lining paper to disguise these and ensure a smooth surface. Lining paper should be hung horizontally to prevent the new wallpaper from shrinking when it is hung, stopping gaps between your wallpaper strips from forming. Be sure to wait at least 12 hours for the lining paper to dry before beginning to hang your wallpaper.
If you have any bigger imperfections in your walls then you will need repair these with filler and then sand them down leaving a smooth surface.
SAFETY TIP: When using filler or sugar soap wear protective gloves and safety goggles.
If you are wallpapering a whole room then we advise that you remove any furniture from the room, if not possible then move all your furniture into the centre of the room. Use a protective dust sheet to cover your floor and furniture.
TIP: We also recommend that you finish any other decorating tasks in your room such as; painting skirting boards or painting ceilings, before you begin with your wallpapering to avoid getting paint on your new wallpaper.
Step-by-Step for Paste-the-Wall Wallpaper:

Step 1:
Use a spirit level to mark a vertical line 50cm from your starting point, the corner of the wall. This ensures that you start wallpapering from a perfectly straight hanging mark.
Step 2:
Following the manufactures instructions, you need to prepare your adhesive. If it is not pre-mixed then you need to mix the adhesive.
Step 3:
Using a pasting roller or pasting brush apply the adhesive, to the section of the wall in which you are about to cover, in a thin and even layer.
Step 4:
Line up your first strip with your vertical guide line keeping 2cm on the ceiling allowing for a straight cut. Once you are confident that it is straight then use a wallpaper smoother to smooth the surface. Work from the centre of the paper outwards to smooth out any air bubbles and wrinkles.
Step 5:
Trim off the excess paper from the top and bottom using a retractable knife or trimming wheel.
Step 6:
Repeat this measuring, cutting and pasting process for the rest of the wall, making sure the seams and patterns line up each time. Then, using a seam roller smooth the joins between the strips of paper.
Step 7:
If you are wallpapering multiple walls then begin the process again using a spirit level to ensure the first drop is lined up accurately.
Step 8:
You may need to cut your final piece vertically in order for it to fit. To do this create a sharp crease in the corner and use your scissors or retractable knife to cut down.
Step-by-Step for Paste-the-Paper Wallpaper:
Step 1:
Use a spirit level to mark a vertical line 50cm from your starting point, the corner of the wall. This ensures that you start wallpapering from a perfectly straight hanging mark.
Step 2:
Following the manufactures instructions, you need to prepare your adhesive. If it is not pre-mixed then you need to mix the adhesive.
Step 3:
Lay your first strip onto a pasting table with the patterned or coloured side down. Apply the adhesive with a pasting brush or roller to the wallpaper, working from the centre outwards.
Step 4:
Once you have covered all the paper on the table fold it over onto itself, try to avoid creasing the paper. Continue pasting until the full drop is covered in adhesive and folded onto itself. Allow time for the paste to soak into the paper.
Tip: Clear any excess adhesive from the pasting table as you go to avoid getting any on the face of the next strip.
Step 5:
Line up your first strip with your vertical guide line keeping 2cm on the ceiling allowing for a straight cut. Once you are confident that it is straight then use a wallpaper smoother to smooth the surface. Work from the centre of the paper outwards to smooth out any air bubbles and wrinkles.
Step 6:
Trim off the excess paper from the top and bottom using a retractable knife or trimming wheel.
Step 7:
Repeat this measuring, cutting and pasting process for the rest of the wall, making sure the seams and patterns line up each time. Then, using a seam roller smooth the joins between the strips of paper.
Step 8:
If you are wallpapering multiple walls then begin the process again using a spirit level to ensure the first drop is lined up accurately.
Step 9:
You may need to cut your final piece vertically in order for it to fit. To do this create a sharp crease in the corner and use your scissors or retractable knife to cut down.
How to Paper Around Corners:
-Internal Corners:
Step 1:
Measure the gap from the edge of the wallpaper to the corner. Do this at the top, middle and bottom of the wall as it is unlikely that the corner is square. Be sure to add 2-3cm to the longest measurement and mark this onto your wallpaper strip. Using scissors or a retractable knife cut vertically along this line.
Step 2:
Place the wallpaper against the wall and smooth down. You will also need to smooth the paper into the corner and onto the next wall.
Step 3:
If your wallpaper does not have a pattern, or in the case where the distance from the edge of your paper to the corner was more than half of the strip then all you have to do is start this new wall with a full width of wallpaper.
Step 4:
If your wallpaper has a pattern or the distance from the edge of your paper to the corner was less than half of the strip then the next step is slightly more complicated. Start by marking the distance needed to complete a full width of the roll, minus the 2-3cm overhang, on to your next strip. Then cut it to size.
Step 5:
Next measure the width of your next strip onto the wall from the corner and mark a vertical line using a spirit level and pencil. Align the edge of your wallpaper strip to your marked vertical line such that the wallpaper overlaps the corner. Try and match your pattern up as best as you can.
-External Corners:
Step 1:
Wrap the wallpaper around the corner and using a wallpaper smoother smooth down the wallpaper.
Step 2:
Measure the width of your wallpaper on the new wall and mark a vertical line using a spirit level and pencil. Use this vertical line as a guide to try and match the pattern as best as you can.
How to Paper around Doors and Windows:
Step 1:
Attach the wallpaper as normal covering the openings with the wallpaper strip. Smooth down the wallpaper up to the door/window frame and mark, with a pencil, the top corner onto your wallpaper strip.
Step 2:
Using your scissors cut a 45° diagonal line from the edge of the wallpaper strip to your pencilled mark such that you are left with an approximate overhang of 5-6cm.
Step 3:
With a smoother smooth out the wallpaper around the door/window frame, next using a retractable knife or trimming wheel trim off the excess wallpaper.
How to Paper around a Radiator:
Ideally you would remove any radiator before your wallpapering work begins however it you are unable to do so you will need to wallpaper around and behind them. Remember to turn off the radiator and allow time for it to cool down before you begin.
Step 1:
Hang the wallpaper as normal up to the radiator and make a cut using scissors and a straight edge such that the wallpaper hangs over the radiator by around 15cm.
Step 2:
Feed the paper behind the radiator and mark onto the paper the positioning of the radiator brackets. At these marks cut a slit at the bottom of the paper.
Step 3:
Apply your paste behind the radiator and then conscientiously again feed the paper down behind the radiator using a radiator roller to smooth it down.
Step 4:
If you have a gap from your radiator to your skirting boards then you will need to measure this gap and cut an appropriately sized strip to fit here.
Step 5:
If you need to wallpaper around a pipe then apply paste to the wall, a brush will be needed here, and place the wallpaper behind the pipe and then smooth it out.
How to Paper around a Light Switch or Socket:
Step 1:
Start by isolating the power to the switch/socket.
Step 2:
Apply the wallpaper as normal and let the wallpaper hang over the switch/socket. Mark the four corners of the plate onto the paper using a pencil.
Step 3:
Use a retractable knife to make a hole at the centre of your marks then use scissors to cut diagonally to each of them. Trim away the excess paper leaving a small overlap of about 1-2cm.
Step 4:
Unscrew the sockets/switches screws enough that you can feed it through your hole. Then using a smoother, feed the paper behind the plate. Once the paper sits smoothly behind the plate replace and screw in the screws.
Check out all our other blogs: Click Here
[…] Check out our wallpapering blog: click here […]